If you’re looking for a plant that’s easy to grow and care for, has beautiful blooms, and is useful in the garden, look no further than the marigold. In this blog post, we’ll show you how to grow marigolds from seed so you can enjoy these lovely flowers all season long.
Why Marigolds.
Marigolds are one of the easiest flowers to grow. They can be started from seed, transplanted easily, and will bloom all summer long with very little care.
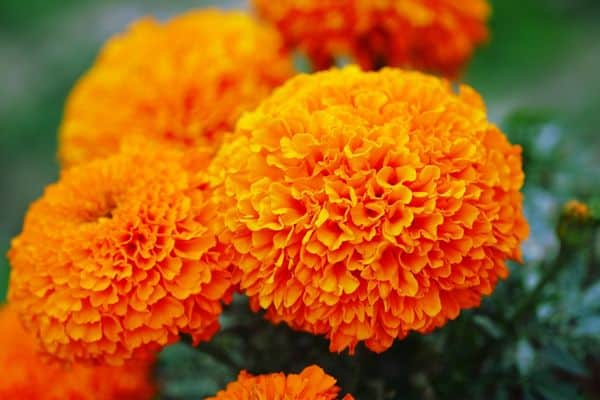
Marigolds are beautiful.
Marigolds come in a wide range of colors including yellow, orange, red, and multi-colored varieties. They make great cut flowers and add color and cheerfulness to any garden.
Marigolds have many uses.
Not only are marigolds beautiful, but they also have many practical uses. Marigolds are excellent companion plants and can help deter pests in the garden. They also make good cut flowers for indoor arrangements.
How to Grow Marigolds.
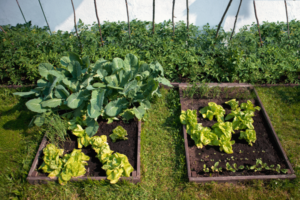
Marigolds grow best in full sun and well-drained soil. If you live in an area with hot summers, choose a spot that gets afternoon shade. Avoid planting marigolds where water collects after a rain, as this can lead to root rot.
Prepare the soil.
Before planting, work some compost or aged manure into the soil to improve drainage and add nutrients. Marigolds are not fussy about soil pH, but if your soil is very alkaline (above 7.5), adding some sulfur will help lower the pH and make it more acidic.
To start seeds indoors, fill planting trays or pots with a sterile seed-starting mix and lightly dampen it. Sow seeds on the surface of the mix, pressing them in slightly so they make good contact with the moistened soil. Place the tray or pot in a warm spot out of direct sunlight and keep the mix moist but not soggy until seeds germinate, which usually takes 7 to 10 days.
Sow the seeds.
Sow marigold seeds directly in your garden after all danger of frost has passed and the soil has warmed up—usually late spring or early summer depending on your location. To sow, create furrows ½ inch deep spaced 12 inches apart then sprinkle seeds thinly along each row taking care not to overcrowd them (marigolds only need about 4 square inches of space per plant). Gently press seeds into the furrow then cover with ¼ inch of fine garden sand or vermiculite then lightly tamp down again so no air pockets remain around the seed which could cause poor germination rates. Water gently using a fine mist setting on your hose nozzle until evenly moist then keep an eye on things making sure the top few inches of soil doesn’t dry out during germination which can take anywhere from 5 to 21 days depending on conditions such as temperature and humidity levels as well as how fresh your seed packet is—older seed takes longer to germinate than fresh seed does.
Thin the seedlings.
Once seedlings have sprouted and reached about 3 inches tall it’s time to thin them by snipping off all but one or two of the strongest plants per clump leaving about 6 to 8 inches between each remaining plant—this may seem brutal but trust me, it’s necessary because too many plants competing for resources results in spindly growth and fewer flowers overall so better to have fewer stronger plants than lots of weak ones!
Water and fertilize regularly
Water newly planted marigold seeds daily until they germinate then taper off watering to once per week unless rainfall is less than 1 inch per week in which case you’ll need to supplement with irrigation applied at ground level using a soaker hose or drip system taking care not to wet foliage which can promote fungal diseases like powdery mildew—water early in the day so leaves have time to dry before nightfall when humid conditions are more favorable for fungal growth. For best results, fertilize marigolds every 2 to 4 weeks using a water-soluble fertilizer such as 20-20-20 applied at half the recommended rate listed on the package.
Pests and Diseases.
There are a few common pests that can attack marigolds. These include aphids, earwigs, slugs, and snails. To control these pests, you can use a variety of methods such as hand-picking, traps, and barriers. You can also use insecticidal soap or neem oil to get rid of them.
Common diseases.
Marigolds are also susceptible to a few diseases. These include powdery mildew, rust, and leaf spot. To prevent these diseases from occurring in the first place, make sure to choose disease-resistant varieties and avoid overcrowding your plants. If they do occur, you can treat them with fungicides.
Harvesting and Storing.
Marigolds are typically harvested when they are in full bloom and before the first frost of the season. The best time to harvest is in the morning after the dew has evaporated but before the heat of the day sets in. To harvest, cut the stem at least 2-3 inches below the flower head.
How to store.
After harvesting, it is important to properly store your marigolds to ensure that they maintain their freshness and quality. Marigolds can be stored in a vase with water or in a dry container such as a paper bag. If you are storing them in a vase with water, be sure to change the water every few days and trim any discolored leaves or stems. If you are storing them in a dry container, be sure to keep them out of direct sunlight and away from any sources of heat or moisture.
Conclusion
Marigolds are one of the easiest flowers to grow and make a beautiful addition to any garden. They have many uses, from adding color and brightness to your garden, to deterring pests and diseases. With just a little care, you can have a thriving marigold patch that will provide you with blooms all season long.